Hi all!
Many of you would like in-app notifications in their app.
Now it’s possible without using third party tools.
All video demos are in the first comment!
Introduction
You will be able to push notifications in your app for anything: new comments, new tasks, new projects…
I tried to replicate all what could offer a decent third party notification tool in terms of UX.
- A straightforward notification center for the end user.
- In-App notifications that are only related to the logged in user
- A visual indication of new notifications (different colors and dynamic number)
- Having the possibility to delete a notification.
- Not now but soon: Having the possibility to click on a notification item to be redirected directly to the right page with the right recordId.
- Adapted on mobile (the guide is also a great, yet hard, exercice to know how to deal with mobile user experience using custom code)
Here is how to do it.
Disclaimer: this feature is one of hardest (THE hardest) I have ever made. So please take time to read it at first without trying to make it because there is a lot to digest. Then follow the steps without being in a hurry, check everything, step by step.
You need to have a strong understanding of how Airtable works so you can adapt it easily to your use case.
My use case is to have in-app notifications for new projects and new tasks related to the logged in user.
Your very 1st step = you need to disable the user caching in the app settings ⇒ advanced settings. Otherwise the number of remaining unread notifications will take a lot of time to update.
1) First of all let’s setup the database.
A) In your Airtable base add a table called “Notification center”
Create a text field and call it “Notification”. Nothing more.
Then create two “link to another record” fields for Tasks and for Projects. (I call these fields “Task” and “Project”)
Now go back to the “Notification” field and make it a formula field with this formula:
It will dynamically name a notification whether it’s a task or a project.
IF(Task=BLANK(), 'New project: '&Project, 'New task: '&Task)
Add a look up field from the “link to another record” field named “Project” to display the name of the user from the Project table. If you made some good work on your database, there should already have a “link to another record” field linking Users and Projects.
Do the same for Tasks. Careful, here it can be a bit different as I linked projects and users, I linked projects and tasks but there is no direct link between tasks and users (which is normal). So you will need to take the name of the user from the task table, from the “linked to another record” related to projects.
Add another look up field from the “link to another record” field named “Task” to display the recordId of the task from the Task table. Name this lookup field “RecordId (from Task)”.
Do the same for Project. Name the lookup field “RecordId (from Project)”.
Add a new formula field named “Hyperlink Notification”. In the frontend, it will let the user click on a preformatted text to be redirected to the right page (without creating a new tab in your browser and, if in a modal, to redirect outside of the modal).
IF(
  Task = BLANK(),
  '<a href="https://test-play.softr.app/project-details?recordId=' & {RecordId (from Project)} & '" target="_parent">New project: ' & Project & '</a>',
  '<a href="https://test-play.softr.app/task-details?recordId=' & {RecordId (from Task)} & '" target="_parent">New task: ' & Task & '</a>'
)
Add now another field named “Created Date”. It’s a “Created Time” field, with the option “include time” enabled.
And finally, let’s add another formula field that will display a relative time (relative from now). This way the users will know when the notifications appeared (1hour ago? 1 day ago? 1 week ago? etc.). I named this field “Relative time”.
Here is the formula to use:
IF(
    DATETIME_DIFF(NOW(), {Created Date}, 'y') > 0,
    CONCATENATE(
        DATETIME_DIFF(NOW(), {Created Date}, 'y'), " year",
        IF(DATETIME_DIFF(NOW(), {Created Date}, 'y') = 1, "", "s"), " ago"
    ),
    IF(
        DATETIME_DIFF(NOW(), {Created Date}, 'M') > 0,
        CONCATENATE(
            DATETIME_DIFF(NOW(), {Created Date}, 'M'), " month",
            IF(DATETIME_DIFF(NOW(), {Created Date}, 'M') = 1, "", "s"), " ago"
        ),
        IF(
            DATETIME_DIFF(NOW(), {Created Date}, 'w') > 0,
            CONCATENATE(
                DATETIME_DIFF(NOW(), {Created Date}, 'w'), " week",
                IF(DATETIME_DIFF(NOW(), {Created Date}, 'w') = 1, "", "s"), " ago"
            ),
            IF(
                DATETIME_DIFF(NOW(), {Created Date}, 'd') > 0,
                CONCATENATE(
                    DATETIME_DIFF(NOW(), {Created Date}, 'd'), " day",
                    IF(DATETIME_DIFF(NOW(), {Created Date}, 'd') = 1, "", "s"), " ago"
                ),
                IF(
                    DATETIME_DIFF(NOW(), {Created Date}, 'h') > 0,
                    CONCATENATE(
                        DATETIME_DIFF(NOW(), {Created Date}, 'h'), " hour",
                        IF(DATETIME_DIFF(NOW(), {Created Date}, 'h') = 1, "", "s"), " ago"
                    ),
                    IF(
                        DATETIME_DIFF(NOW(), {Created Date}, 'm') > 0,
                        CONCATENATE(
                            DATETIME_DIFF(NOW(), {Created Date}, 'm'), " minute",
                            IF(DATETIME_DIFF(NOW(), {Created Date}, 'm') = 1, "", "s"), " ago"
                        ),
                        "less than a minute ago"
                    )
                )
            )
        )
    )
)
That’s it for the notification center table.
Now brace yourself, the process gets a little more complicated ![]() .
.
B) Go to the Tasks table
You should have a “link to another record” field linking to the notification center. I named it “Notification center”.
Add a rollup field named “Rollup Not read - Notif for a task”. Rollup source is “Notification center”. Notification center field you want to roll up is “Notification” (the primary formula field named “Notification”). Don’t include linked records that meet certain conditions. Then the aggregation formula which rolls up the values in each linked record is: COUNTA(values)
C) Go to the Project table
Reminder: in my setup I have projects and tasks. A project can have multiple tasks. So there is a “link to another record” field named “Tasks” in my Project table. Do it if it’s not already done.
Add a look up field from the “link to another record” field “Tasks”. Lookup source will be Tasks. Tasks field you want to look up will be “Status from Notification center”.
Add a rollup field named “Rollup Not read - Notif for a project”. Select rollup source is “Notification Center”. Notification center field you want to roll up is “Notification” (the primary formula field named “Notification”). Don’t include linked records that meet certain conditions. Then the aggregation formula which rolls up the values in each linked record is: COUNTA(values)
Add a rollup field named Rollup Not read - Notif for tasks in a project. Select rollup source is “Tasks”. Tasks field you want to roll up is “Rollup Not read - Notif for a task”. Don’t include linked records that meet certain conditions. Then the aggregation foruma which rolls up the values in each linked record is: SUM(values)
Add a formula field named “Formula total notif for a project” with this inside:
{Rollup Not read - Notif for a project}+{Rollup Not read - Notif for tasks in a project}
We are almost there for the database setup.
D) Go to the users table - You will understand better the setup of B) and C)
You should have a “link to another record” field for the projects. I named this field “Projects”
Add a rollup field named “Rollup total NOT_READ notif for the user”. Select rollup source is “Projects”. Projects field you want to roll up is “Formula total notif for a project”. Don’t include linked records that meet certain conditions. Aggregation formula which rolls up the values in each linked record is: SUM(values)
Pause: you may now understand why I made everything come from the projects table. Even the tasks data. As I need a total count of projects and tasks to be displayed in the users table, I took the projects table, which are linked to the users (not the tasks, it is not needed as they are linked to a project) to gather everything.
Add a formula field named “Notif indicator”. The formula is:
IF(NOT({Rollup total NOT_READ  notif for the user} = 0),
  CONCATENATE(
    "<div class='badge-pulse' style='padding: 0 6px;'>",
    "<sl-badge class='initial-pulse-badge' variant='primary' pill pulse style='pulse: 3s;'>", {Rollup total NOT_READ  notif for the user},
    "</sl-badge>",
    "</div>",
    "<style>",
    "@keyframes pulse {",
    "0% { transform: scale(1); }",
    "50% { transform: scale(1.1); }",
    "100% { transform: scale(1); }",
    "}",
    ".badge-pulse sl-badge:not(:last-of-type) {",
    "margin-right: 1rem;",
    "}",
    "</style>"
  ),
  CONCATENATE(
    "<div class 'badge-pulse' style='padding: 0 5px;'>",
    "<sl-badge variant='neutral' pill>0</sl-badge>",
    "</div>",
    "<style>",
    ".badge-pulse sl-badge:not(:last-of-type) {",
    "margin-right: 1rem;",
    "}",
    "</style>"
  )
)
Now you may ask yourself “What the hell is this? ![]() ”. This formula above displays a web component from the Shoelace library that you can find here (you can see different variations in the link). This is the badge component that will be displayed in Softr to notify users with a color and a number. If there is a notification for a user the badge will display the number of notifications + a blue color + a pulsating effect. Otherwise, if there is no notification, the badge will display “0” + a grey color without pulsating effect.
”. This formula above displays a web component from the Shoelace library that you can find here (you can see different variations in the link). This is the badge component that will be displayed in Softr to notify users with a color and a number. If there is a notification for a user the badge will display the number of notifications + a blue color + a pulsating effect. Otherwise, if there is no notification, the badge will display “0” + a grey color without pulsating effect.
This can be customized according to the documentation of Shoelace (Colors and pulsating effect which can be removed in any case).
E) Create two Airtable automations
When a new project or a new task will be created in their respective table => it needs to create a new record in the notification center table.
See the two following screenshots (these are super simple automations)
For any new project:

For any new task:

You may not believe it… But this is the end for the database setup ![]()
![]()
Have a break, have a coffee.
2) Let’s setup the frontend inside the Softr studio
We will treat to use cases:
A notification badge displayed in the header block of the logged in users.
A notification badge as a floating button, displayed in all pages of the app (but only visible to logged in users)
Before going further, create a page named “notification center” and remove the default header & footer. That’s it, we will go back to it later.
A) Notification badge displayed in the header
Choose the header where you want to display the notification badge for logged in users (it needs to be a header for logged in users only)
In my case, the header has the ID “home-header1”
In this same header add a link (you can also use a button, up to you to get the right design within the Softr studio).
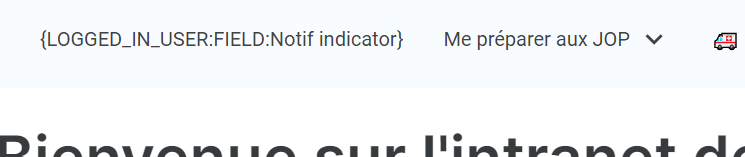
The link text will be: <span class="desktop-notif">{LOGGED_IN_USER:FIELD:Notif indicator}</span>
Adapt it by replacing “Notif indicator” by the corresponding field in your Airtable table for users (Careful it’s case sensitive).
The action will be “Open modal”. Choose the size you want for the modal. Choose the page “notification center” that you just created.
Now go to the app settings and go to custom code.
First copy paste the code below in the header custom code to enable the Shoelace web component library:
<link rel="stylesheet" href="https://cdn.jsdelivr.net/npm/@shoelace-style/shoelace@2.13.1/cdn/themes/light.css" />
<script type="module" src="https://cdn.jsdelivr.net/npm/@shoelace-style/shoelace@2.13.1/cdn/shoelace-autoloader.js"></script>
Then add this code in the header custom code:
Special kudos to Astghik, Softr junior frontend engineer, who helped me a lot to overcome the very frustrating responsiveness on mobile and tablets and as a consequence, impeached me from losing all my hair ![]() …
…
<style> /* if you already have <style> </style> please don't re-add it, insert the code in it.*/
.tablet-notifBadge {
    display: flex;
    flex-direction: column;
    justify-content: center;
    align-items: center;
}

@media (max-width: 770px){
    a:has(span.desktop-notif){
         display: none!important;
    }
}
</style>
Then add these two scripts in the header custom code:
Everywhere you see “home-header1” ⇒ update it with your current header ID. Same for “Notif indicator”, by updating it with the corresponding field in your Airtable table for users (case sensitive).
Again, special kudos to Astghik who helped me a lot for the responsiveness on mobile and tablets ![]()
<script>
window.addEventListener('block-loaded-home-header1', () => {
    if (window['logged_in_user'] && window['logged_in_user']['Notif indicator'] && window.innerWidth > 991) {
        console.log('Block loaded on desktop');
        const nameData = window['logged_in_user']['Notif indicator'];
        $("#home-header1 .desktop-notif").html(nameData);
    }
});
</script>

/* script above is for desktop, script below is for tablets and mobile */

<script>
window.addEventListener('block-loaded-home-header1', () => {
    if (window['logged_in_user'] && window['logged_in_user']['Notif indicator'] && window.innerWidth < 991) {
        console.log('Block loaded on tablet');


        let notifBadge = document.createElement('div');
        notifBadge.classList.add('tablet-notifBadge');

        const nameData = window['logged_in_user']['Notif indicator'];
        notifBadge.innerHTML = nameData;

        notifBadge.addEventListener('click', () => {
            window.location.href = '/notification-center';
        });

         document.querySelector('#home-header1 .container > div').lastChild.prepend(notifBadge);
         setTimeout(()=>{
         let tabletIconsContainer = document.querySelector('#home-header1 .container > div').lastChild;
             if(tabletIconsContainer.children.length === 2
             && tabletIconsContainer.children[0].classList.contains('tablet-notifBadge')
             && tabletIconsContainer.children[1].firstChild.classList.contains('MuiAvatar-root')) {
             console.log('hereeee');
                 document.querySelector('#home-header1 .tablet-notifBadge').style.marginRight = '24px';
             };
         }, 300)


    }
});

</script>
That’s it. We will treat the notification center page at the very end.
B) Notification badge displayed as a floating button at the bottom right of pages
First, add <div class="floating-button"></div> in the app settings, footer custom code
Then, in the settings of the app, header custom code, add the styles and scripts below to create the floating button. This is fully customizable in terms of graphic design, but you need basic knowledge of CSS.
Update “Rollup total NOT_READ notif for the user”, in the first script, with the corresponding field in your Airtable table for users.
As a reminder “Rollup total NOT_READ notif for the user” is a rollup field mentioned in the first part of the guide, inside D).
Also, in the first script, this line: window.openSwModal(‘https://yourdomain/notification-center’, ‘md’);
Change https://yourdomain/notification-center by the correct url and, if needed, change ‘md’ (medium size modal) by ‘lg’ if you want a large size modal or ‘sm’ if you want a small size modal
In the second script update this line: if (window.location.pathname === “/notification-center”) { with the correct url.
<style>
    .floating-button {
        display: none;
        position: fixed;
        bottom: 20px;
        right: 20px;
        width: 48px;
        height: 48px;
        margin: 10px;
        background-color: #007bff;
        color: #fff;
        border-radius: 50%;
        text-align: center;
        line-height: 48px;
        cursor: pointer;
        z-index: 9999;
        animation: pulse 1.5s infinite alternate;
    }

    .floating-button:hover {
        background-color: #0056b3;
        animation: none;
    }

    .floating-button.grey {
        background-color: #666;
    }

    @keyframes pulse {
        0% {
            transform: scale(1);
        }
        100% {
            transform: scale(1.1);
        }
    }
</style>

<script>
window.addEventListener('DOMContentLoaded', () => {
    const floatingButton = document.querySelector('.floating-button');
    if (window['logged_in_user']) {
        floatingButton.style.display = 'block';

        const totalNotif = parseFloat(window['logged_in_user']['Rollup total NOT_READ notif for the user']);
        if (totalNotif === 0) {
            floatingButton.classList.add('grey');
            floatingButton.textContent = '0';
            floatingButton.style.animation = 'none';
        } else {
            floatingButton.textContent = totalNotif;
        }

        const handleClick = () => {
            if (window.innerWidth < 991) {
                window.location.href = '/notification-center';
            } else {
                window.openSwModal('https://yourdomain/notification-center', 'sm');
            }
        };

        floatingButton.addEventListener('click', handleClick);
    } else {
        floatingButton.classList.add('grey');
        floatingButton.textContent = '0';
        floatingButton.style.animation = 'none';
    }
});
</script>

<script>
if (window.location.pathname === "/notification-center") {
    window.addEventListener('DOMContentLoaded', () => {
        var isInsideIframe = window.self !== window.top;

        document.querySelectorAll('.floating-button').forEach(button => {
            button.style.display = isInsideIframe ? 'none' : 'block';
        });
    });
}
</script>
That’s it! ![]()
Now let’s set up the notification center page.
C) Last step: setup of the notification center page
Add a table block. The name/ID of this block is ‘table1’.
You can use a list block without any problem but some custom styles below are only linked to the table block.
The data source will be the notification center table.
Do not forget to:
a) Add the right visibility conditions so that the correct logged in user sees their own notifications.
In my case the conditions are: “Users (from projects) (from tasks) includes exactly logged in user’s name” OR “Users (from projects) includes exactly logged in user’s Name”
b) Add a sorting. I use the “Created Date” field, sorted as “Z to A” (the most recent notification will appear first).
c) As empty state text I chose “There is no notification yet.”
Let’s also add a back button.
Wait, why would you need a back button if the notification is opened in a modal? ![]()
Because the notification center is also functionnal on mobile and using modals is absolutely not a best practice on mobile.
So when you will click the notification center on mobile you will reach a full page ⇒ we need a go back button that is only visible on mobile.
In order to do so add a CTA block (in my use case the ID of the block is ‘cta1’) and remove all texts to keep one button. Don’t add any action to it. Adjust the colors and padding as you wish.
Now go to the page settings ⇒ custom code ⇒ header and add this to your styles (it will push the button to the left. If you don’t want it, don’t add it):
#cta1 {
  display: flex !important;
  flex-direction: column !important;
  align-items: flex-start !important;
  margin-left: -30px !important;
}
Then , still in the header custom code, add this script:
<script>
window.addEventListener('block-loaded-cta1', () => {
    const buttonClickHandler = () => {
        window.history.back();
    };

    const button = document.querySelector('#cta1 .MuiButtonBase-root');
    button.addEventListener('click', buttonClickHandler);
});
</script>
Don’t forget to add a device visibility condition for ‘cta1’ ⇒ not visible on desktop but visible on tablet and mobile.
Now go back to your table block and add one rich text field for the title of the notification (this way it can display HTML and can be clicked) and a text field for the timeline of the notification.
The rich text field will be linked to the “Hyperlink Notification” formula field.
The text field will be linked to “Relative time” formula field.
If you chose a table block, you can enter this code in the header custom code of the page:
Just change table1 by the correct ID of your table block.
<style>
#table1 .container {
  max-width: none;
}

#table1 .ag-header {
  display: none;
}

#table1 .MuiButtonBase-root:hover {
background-color: #0284c7 !important;
color: white !important;
border: 1px solid #FFFFFF;
}

</style>
3) The user experience of the notification center.
There are other possible setups but I chose the following one as it is the most straightforward. For example it would be possible that on delete or update button click it automatically redirects the user to the right page. It is doable though the user experience is not that good due to the slowness of the buttons.
A) Adding a delete button - labeled “delete” or “remove”
Keep the table block and create a list block (list with timeline).
Add a delete action button on both of them.
For both blocks you will have 2 fields coming from Airtable:
- The “Hyperlink Notification” field that will display the name of the project or of the task + a redirection to the correponding page on click on it. You can use a text field or a rich text field in Softr to pull this data
- The “Relative time” field. You can use a text field or a rich text field in Softr to pull this data.
Set the visibility of the table block to desktop only. Set the visibility of the list with timeline block to mobile and tablets.
The table block is clearly not ideal on mobile, way more adapted on desktop. That’s why we use two layouts in the notification center.
Optional:
Add the script below, in the header custom code of the page. On desktop it will reload the parent page each time the delete button is clicked (not useful on mobile as it is a full page with a go back button ⇒ this is why we only deal with ‘table1’).
You can adapt the delay before any reload occurs. Here I chose two seconds (2000 ms).
<script>
window.addEventListener('block-loaded-table1', () => {
    window.addEventListener('delete-record-success-table1', () => {
        setTimeout(() => {
            window.parent.location.reload();
        }, 2000);
    });
});

</script>
B) Option: add an email notification using Airtable automations
Each time there is a new notification you can double notifications in your app with email notifications with the Airtable emailing or with the Gmail or Outlook integration or with Make (any email provider).
C) More options to come with new data sources and Softr improvements
The guide is made for Airtable and its limitations. Other databases will be added by Softr, like Supabase or Xano. These powerful backends will always be a better choice than Airtable for this feature.
The main reason is the speed of these databases compared to Airtable + realtime data functionality. For example, on a button click the count of unread notifications can be updated instantly.
More powerful backend integrations will make everything smoother.
Same for future Softr features like bulk update - bulk deletion.
The option to have a delete action button or a one click update action button that triggers a redirection to the right page AND a notification count update, at the same time, will be released by myself within the next months.
End of the guide!
You have a lot of options/other possibilities to customize the user experience. Though any change will require many changes in the backend and in the frontend. So you need to be super organized and clearly understand how all works.
For any of those who don’t have the courage to do it or to adapt it to their use case ⇒ I can integrate it in your app*
Also, for those preferring third party tools like magicbell.com or novu.co ⇒ I can integrate them in your app as well*
*Paid services
Thank you and happy to release a project I have been working on since more than 4 months