Hi all,
First of all: the new two way user sync feature doesn’t allow to delete your users in Softr directly from Airtable. The purpose of this limitation is to avoid any unwanted deletion.
Second point: this guide follows best practices in terms of user experience.
So how to let your users delete their own account?
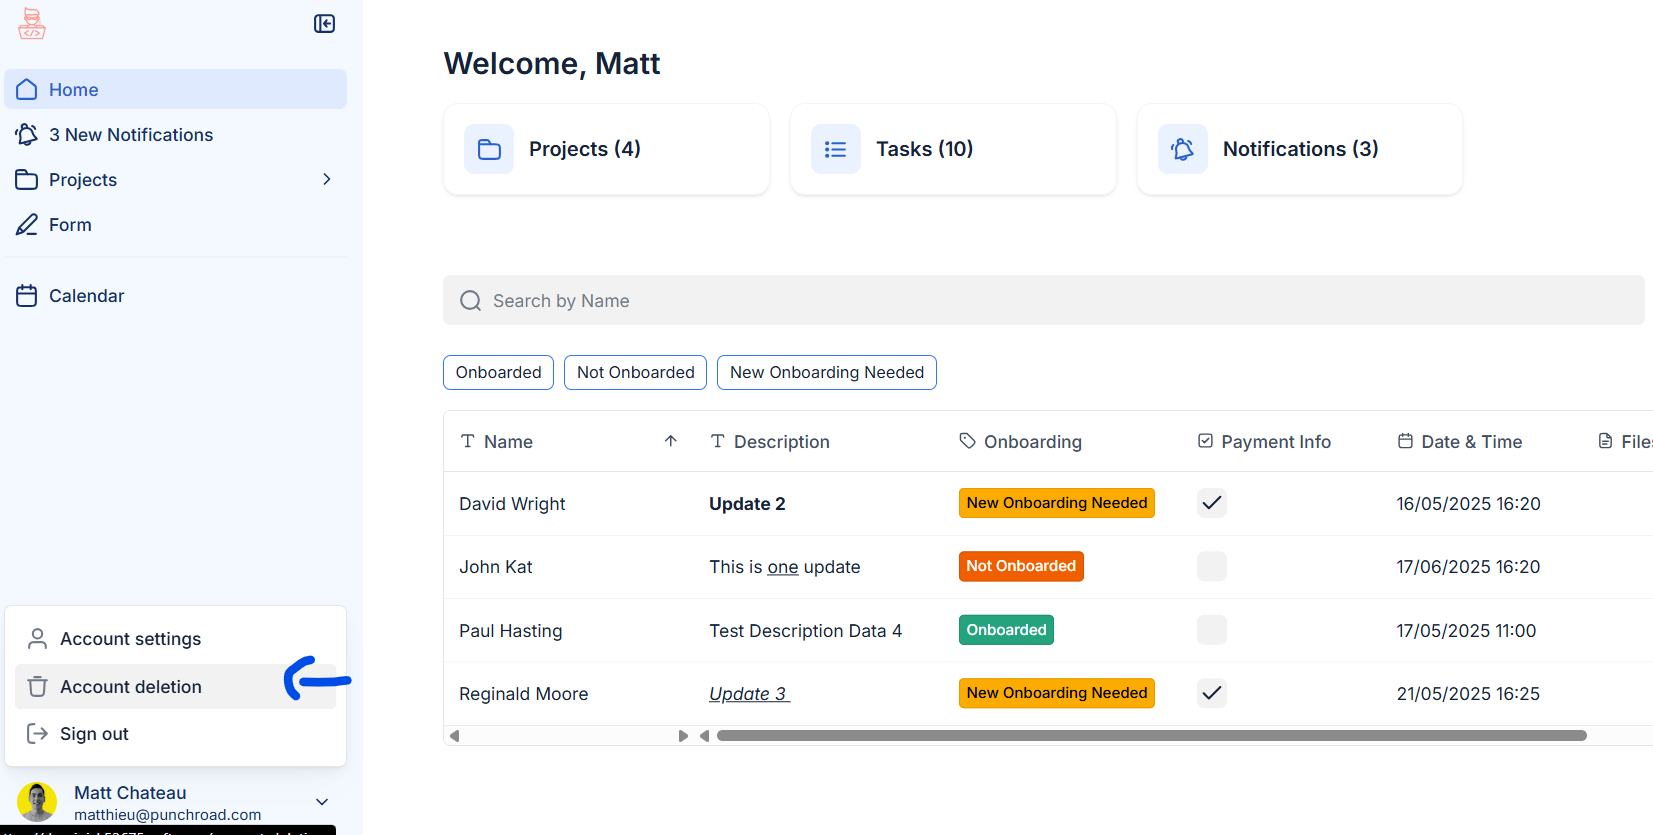
Start by adding a cta block just below a user account block.
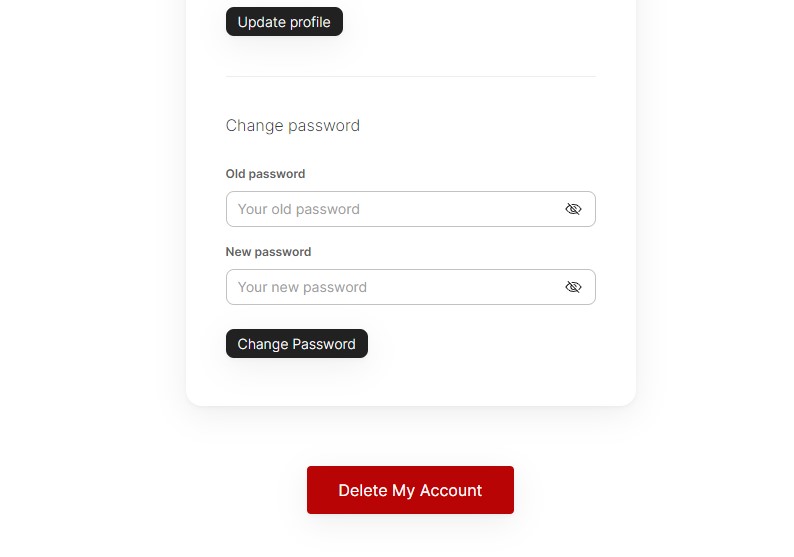
The action for the button “Delete My Account” will be an ‘open modal’ (Here it’s a small size modal). It will open a page with just a form in it.
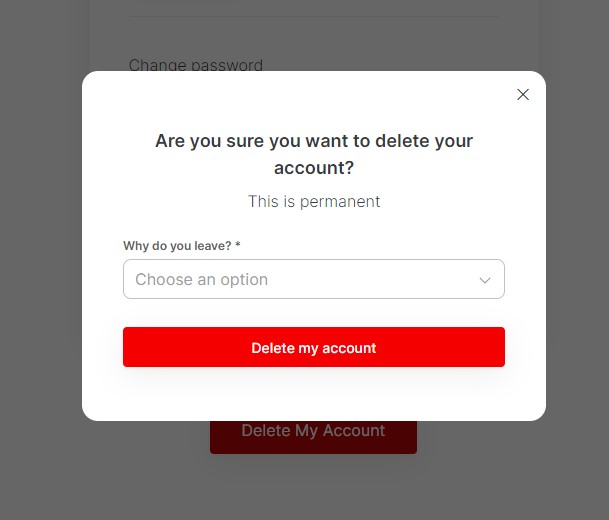
This form has four goals:
- Add a step before deleting the user account, as it is a permanent deletion
- Ask the user for their reason to leave
- Keep track of user deletions (Analytics + possibility to re-engage the user, later)
- And of course, delete the user account.
The form has two hidden fields: logged in user name and logged in user email.
The form has one dropdown field with the options (reasons to leave) manually added and set to ‘required field’.
Also, very important, the datasource option for this form is “Send to Make”.
Here is the Make scenario:
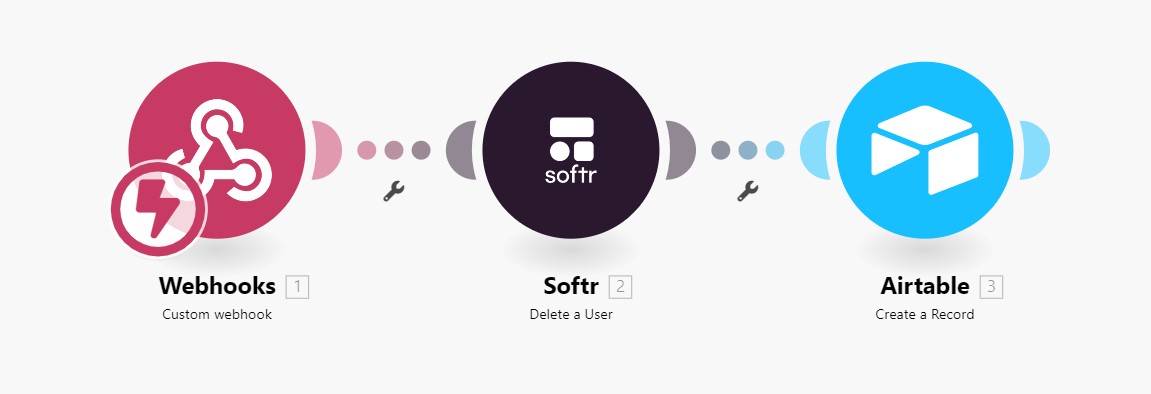
You may wonder why there is an Airtable ‘Create a Record’ module at the end of the scenario. This is made to populate the user deletion table. This way, even if a user deletes their account, you will have their information (specifically their email if you want to re-engage them later).
Here is the User Deletion table:

Last but not least: a small javascript snippet to be added in the page settings (header custom code) where the form is.
This code has two goals:
- Redirect the user to the sign up page (or wherever you want) when their account is deleted
- Add some time before the redirection, as there is an ongoing Make scenario.
Here is the code:
<script>
  document.addEventListener('block-loaded-form2', () => {
    window.addEventListener('submit-form-success-form2', () => {
      setTimeout(() => {
        window.parent.location.href = 'https://yourdomain/signup';
      }, 2000);
    });
  });
</script>
Just replace ‘form2’ by the Id of your form and ‘https ://yourdomain/signup’ by the url you want the user to be redirected to after deleting their account.
Finally, note that this guide might not be fully compliant with the law of your country concerning data privacy and data retention (unless you fully inform your users that their name and email will be kept despite of their account deletion)=> In order to do so, you would need to update the last Make module (the module Create A Record in Airtable) and just have two fields in your user deletion table : Reason to leave + Deletion date (which is a ‘creation date’ type of field in Airtable). Everyhting about the user name and user email should go away.
That’s it!
Here is the final result: