Hi all!
Many Softr users want to offer a free trial for their clients. The most common way is to enable the free trial option offered by Stripe inside a Softr simple checkout block.
Great but it forces your clients to enter their credit card details in order to unlock the free trial. Which can prevent some of them from making a decision to try your product.
So, how to solve this problem?
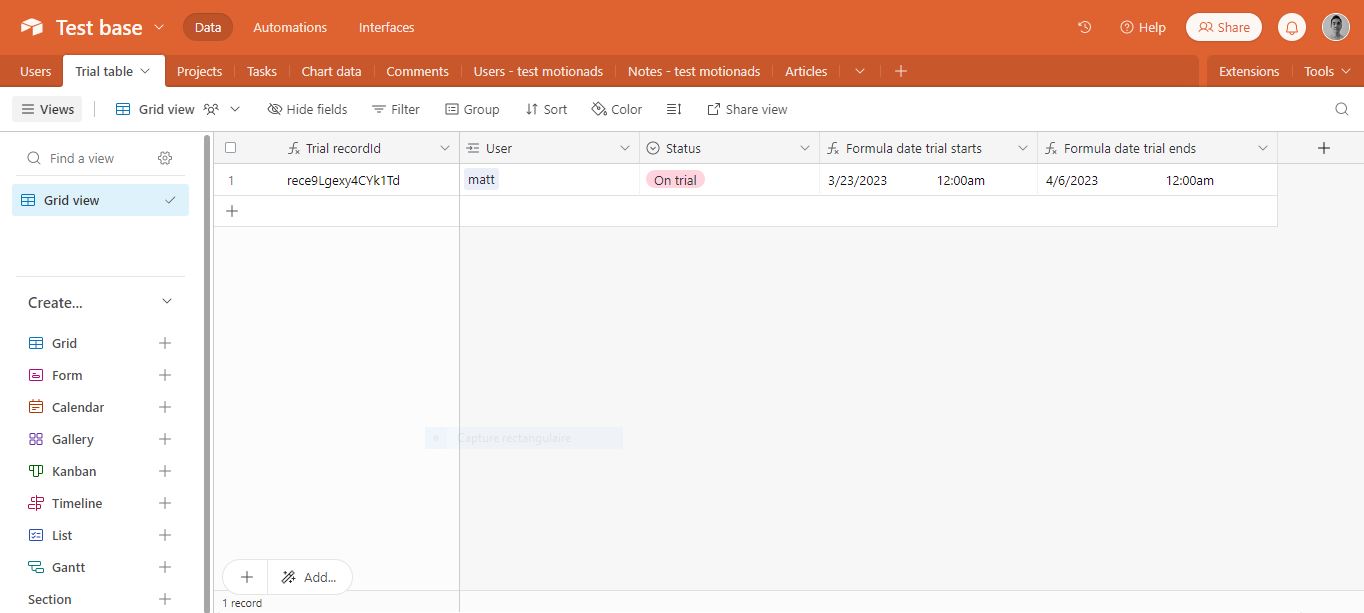
I) First, in your airtable base, create a table called “trial table”.
See the first 3 screenshots to know what to insert in this table.
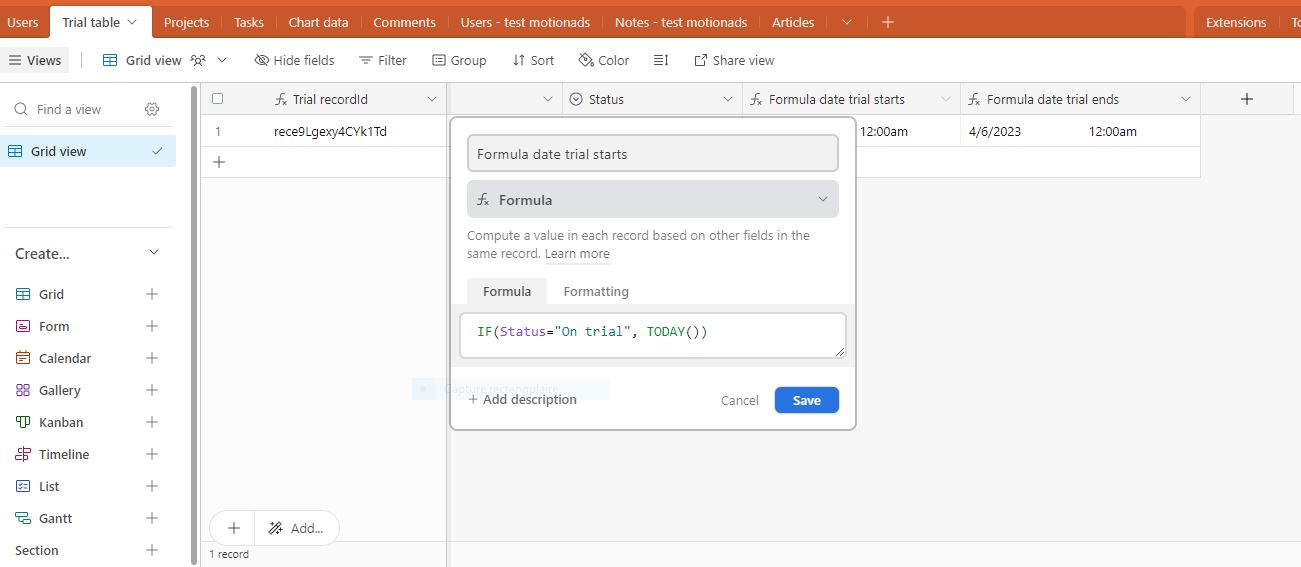
The third screenshot shows that the trial I intend to create lasts 14 days. You can change it, of course, by changing “14” in the formula by your desired number of days.
Then go to the users table, look for the “linked to an other record” field related to the “trial table” and add a lookup field, the one that displays the trial status. That’s it.
Note that both on the users table and in the trial table, the linked records field must have the option “Allow linking to multiple records” disabled.
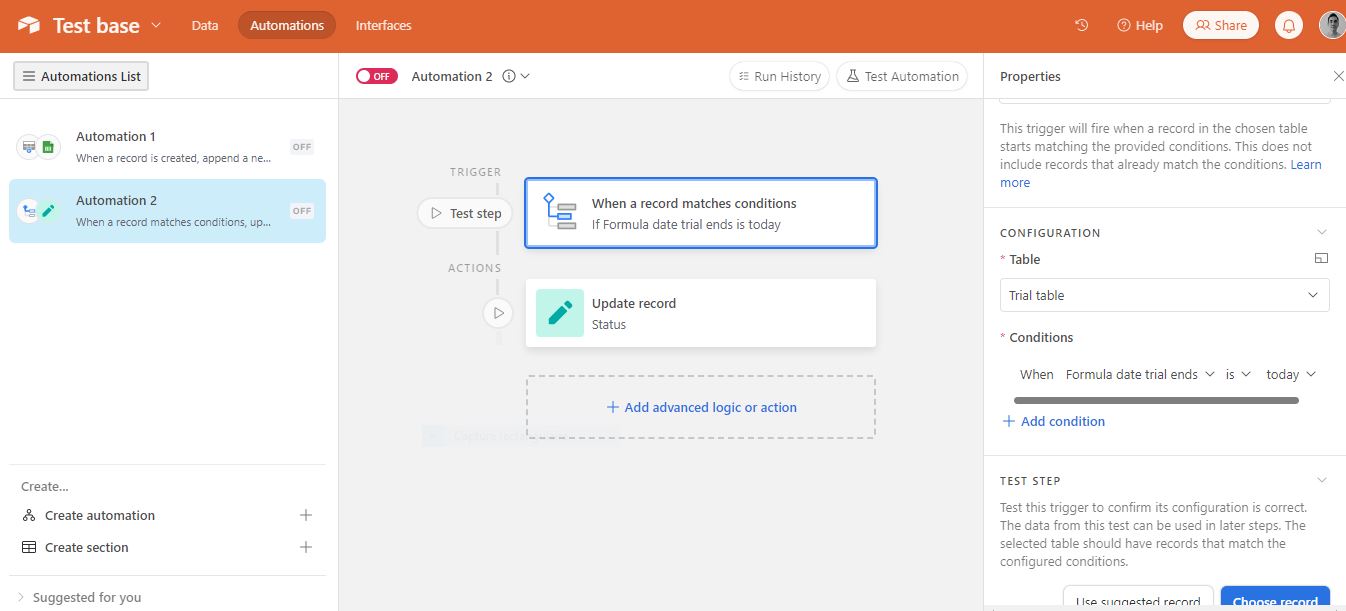
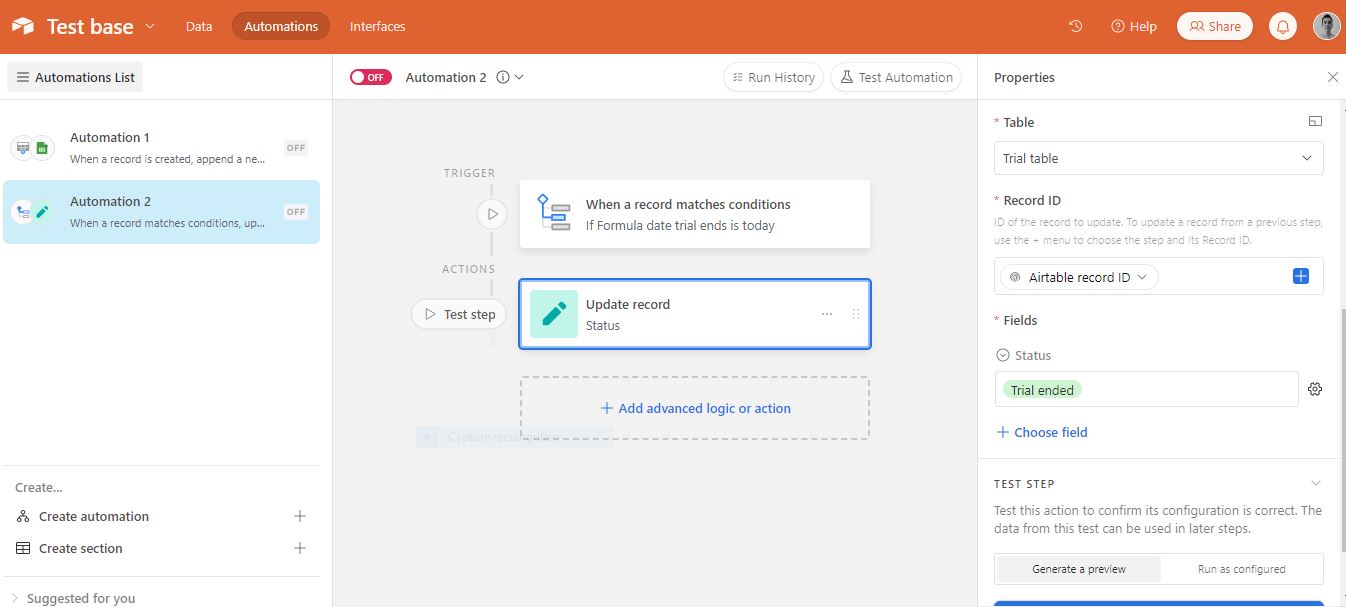
Let’s finish the setup inside Airtable. Go to the automation, add an automation (see screenshot 4 and 5) to know what to insert.
OK, now we are done with Airtable.
II) Let’s go to the Softr studio.
Create a new page. You will call it “start trial”.
In this page, you can disable, if you want, the header and footer. Always good when inside a marketing funnel to not distract the user.
Add a customizable form and a cta below. In the customizable form, choose “send to data source” and choose your ‘trial table’.
Remove all the items of the form to keep only the button. Example of copywriting for the button: “Confirm your trial - no credit card required”.
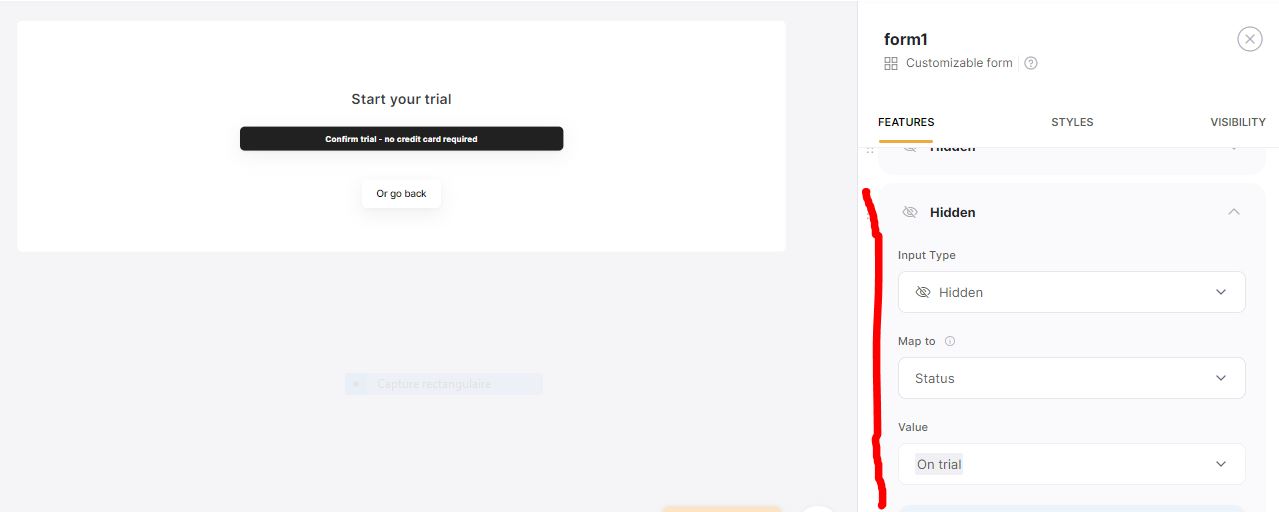
Add two hidden fields (see screenshots 6, 7 and 8)
The cta block, as you can see, will be only used to let the user go back to the previous page (if you want).
You can insert the following piece of code in the footer of the page settings inside “custom code”. Note that you need to add an action “scroll to section” to the cta itself in order to make the code work. Change #cta1 by the id of your cta block and that’s it.
<script>
document.addEventListener('DOMContentLoaded', function() {
  const backButton = document.querySelector('#cta1 a[data-element="button"]:nth-child(1)');

  backButton.addEventListener('click', function() {
    window.history.back();
  });
});
</script>
III) Now let’s go to the user groups in the settings of your app
You will add three user groups.
One will be called “On trial users”. the condition will be: Visible if “Logged in User’s Status (from Trial table)” is “On trial”.
The other group will be called “Trial ended not paid users”. The condition will be: Visible if “Logged in User’s Status (from Trial table)” is “Trial ended” and One time product or subscription is not the corresponding subscription you want to apply to the user after trial.
So Stripe must already be integrated in Softr!
The last and third group will be called “Trial ended paid users”. The condition will be: Visible if “Logged in User’s Status (from Trial table)” is “Trial ended” and One time product or subscription is the corresponding subscription you want to apply to the user after trial.
That’s it! Now you have to change the visibility conditions of the pages and/or blocks you want to hide or show to the users when they are on trial and when their trial is ended.
For the user group “Trial ended not paid users”: you should create a block, only visible to them, leading directly to the stripe payment. The other blocks would have a visiblity condition that allow the user groups “On trial users” or “Trial ended paid user” to view the blocks where the content is.