This guide is mainly for these use cases: paid directories or other gated content apps that need a super short marketing funnel (inside the website).
It can also be good to be used after a successful sales call leading directly to a payment to access an app or some content so the prospect is converted into a paid client as fast as possible.
1) Softr setup
First of all, disable the user caching inside the app settings ⇒ advanced settings.
A) Create a payment page / pricing page with a static pricing block.
I insist on using the static pricing block and not the dynamic block “Stripe simple checkout form”. The first one being more stable than the second one.
I’m using a subscription (from a product!) for the use case
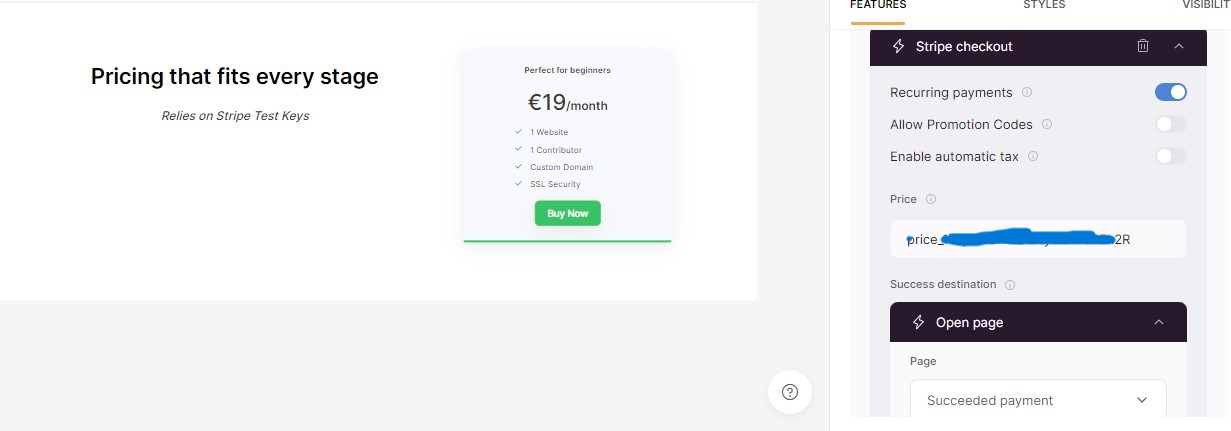
You can find the price ID in Stripe (in the product dashboard)
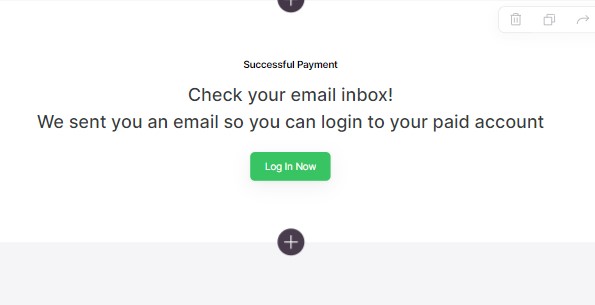
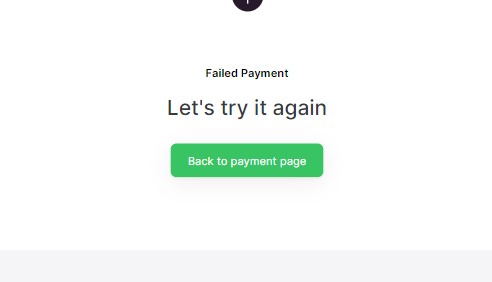
B) Create 2 pages in Softr - one for successful payments and one for failed/canceled payments
These two pages will be used by Stripe and and Softr to redirect the user according to a successful or to a failed/canceled payment.
For example ⇒ for a sucessful payment page:
For a failed/canceled payment page:
Don’t forget to create all the necessary visibility conditions so that a paid user can’t have access to the payment page anymore.
That’s it for Softr, now let’s go to Make.
2) Make setup
Here is a global overview of the scenario:
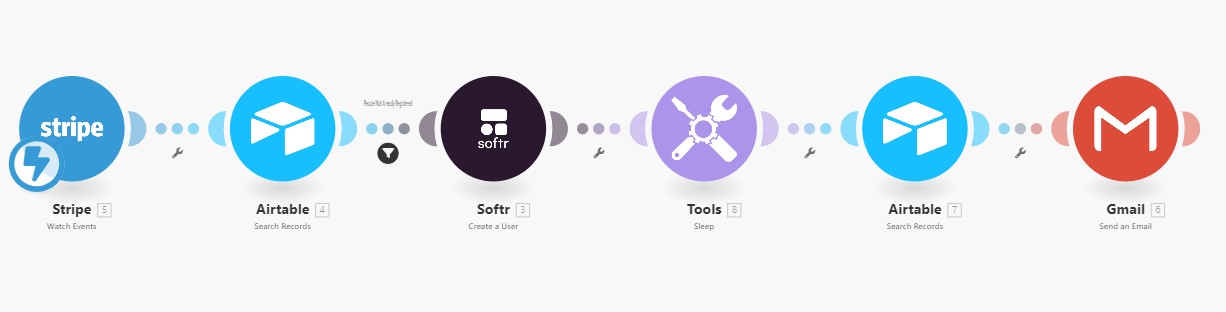
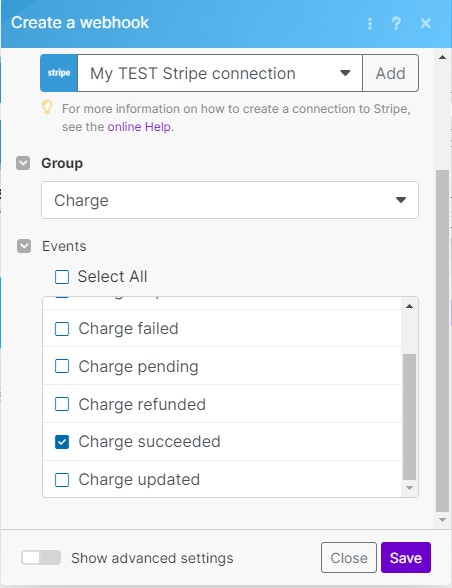
A) Add a Stripe module - Watch events
When this module is added choose “Charge”, inside Group, and then only “Charge succeeded”
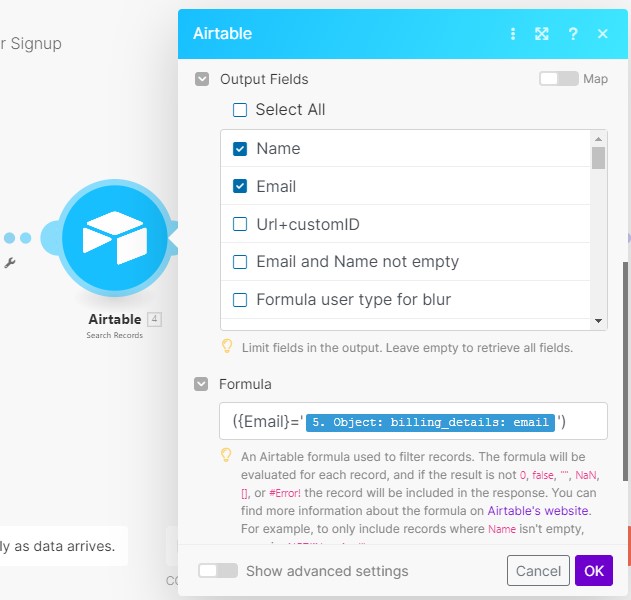
B) Optional - Add an Airtable module - Search Records
This module is optional and will ensure that the user is not already a user in your database.
Just to show you one possibility to adapt the use case.
A router for a reimbursement (if the user is already a paid user) or an email sent explaining the user is already a paid user, or whatever, can be used.
Here is the setup below.
{Email} being the field (case sensitive) in Airtable, in the users table, related to the email of the users.
‘Object: billing_details: email’ comes from the first module
The limit will be 1 (we look for one user already in the database).
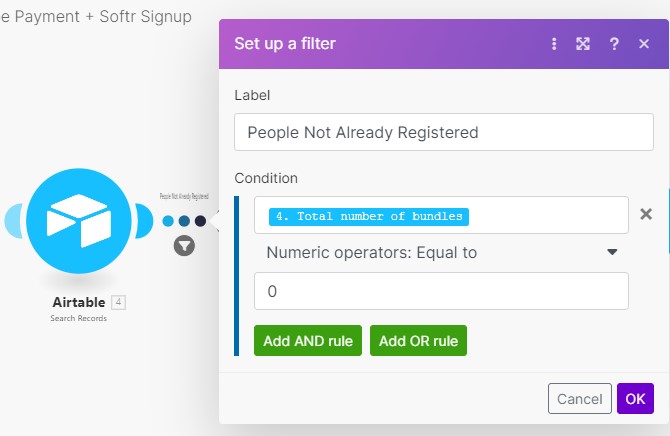
To ensure that the user is not already registered in your database you will also need to add a filter next to the previous module:
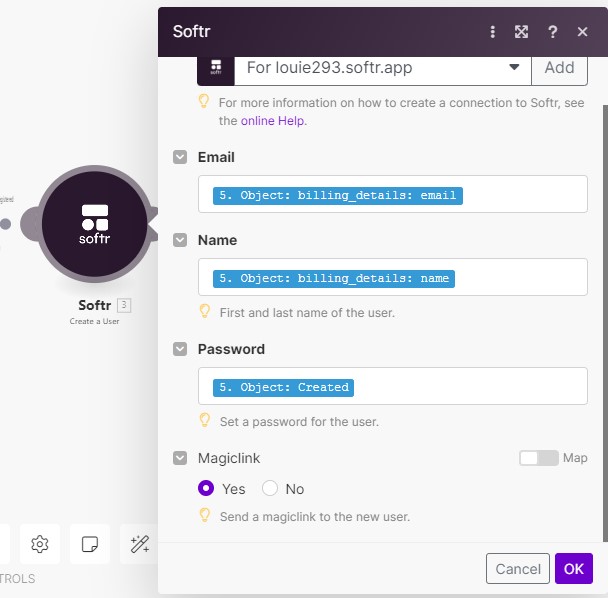
C) Add a Softr module - Create user
All the inputs come from the first module (Stripe module)
The password input is a workaround needed for the end of the scenario, where the email is sent with the temporary password. In other words, I use the created date of the Stripe charge to create a temporary password.
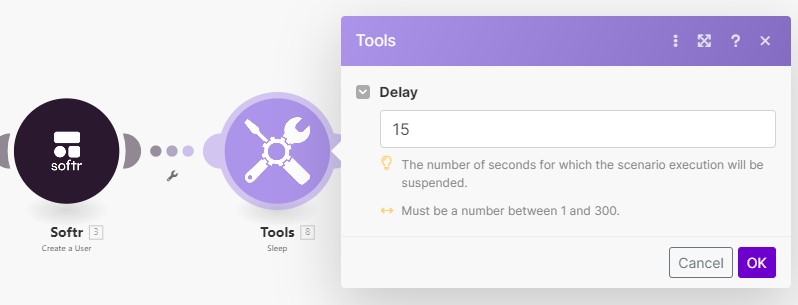
D) Add a “Tools” module - Sleep
This module is important so that all the user data created by Softr can be pulled in time in Airtable.
I chose 15 seconds but it can be a bit less (don’t go below 5 seconds).
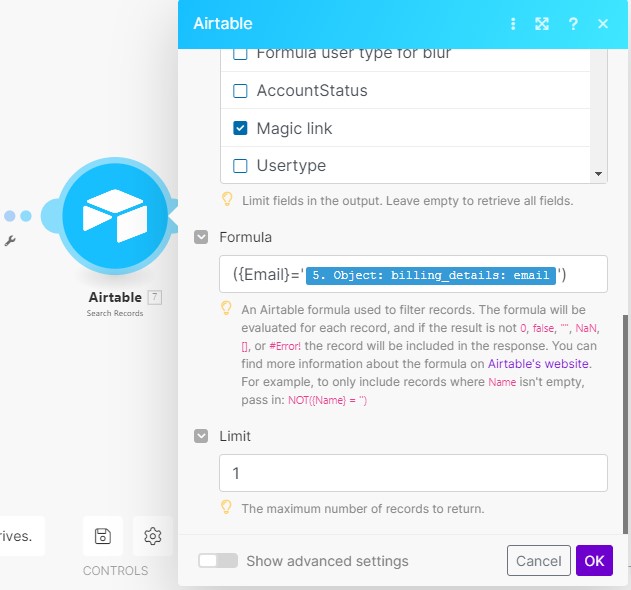
E) Add an Airtable module - Search records
This is used to get the correct user that Softr just created during the previous step.
The limit must be 1.
{Email} being the field (case sensitive) in Airtable, in the users table, related to the email of the users.
‘Object: billing_details: email’ comes from the first module (Stripe Watch records)
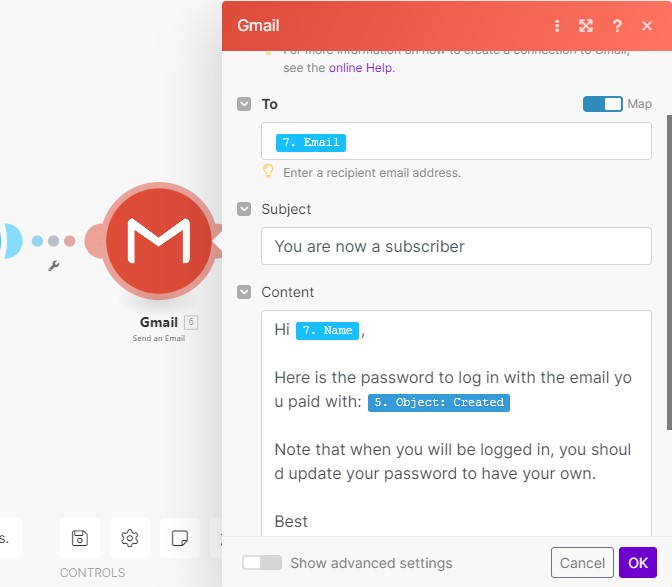
F) Finally add an email module (I use Gmail) - Send an email
The data comes from the previous module - Airtable search records
‘Object: Created’ is the date of creation of the charge in Stripe. Remember: I use it as a temporary password.
That’s it!
Many changes can be brought to this guide as the use cases can be different in terms of process.
Up to you to adapt it so that it takes in count your own processes.