Do you want to limit the type (png? pdf? mp3?) or the size (max. 10mb? max 20mb?) of the files that your users upload?
It’s possible by using Make.
The guide will also focus on creating a decent user experience.
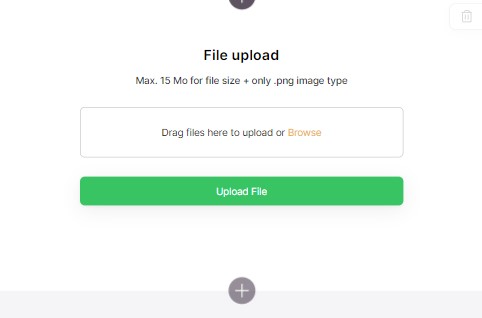
For the guide, the use case is to limit the uploaded files to 15mb and .png file type only.
Of course you can adapt it to your own limitations.
1) File upload using a customizable form - setup
Create a customizable form and choose “send data to Make”.
Add all the necessary inputs (and hidden fields, if necessary, to catch the logged in user id or name or email).
When using send-data-to-make option, the “map to” for each input must be determined by you, freely.
This is the form I’m using for the guide:
On form submit ⇒ choose a message (’Please wait…’ in my case) and not an action.
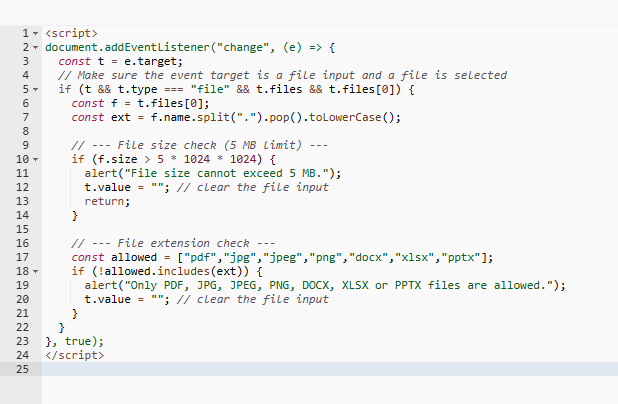
While we are on the upload file page, add this script in the footer custom code of the page and change form1 by the ID/name of your form. It will help for the webhook responses that will be created in Make.
<script>
    window.addEventListener('submit-form-success-form1', (e) => {
        const response = e.detail.response || {};
        const data = response.data;
        if (data && data.redirect) {
            window.location.href = data.redirect;
        }
    });
</script>
2) Redirection pages - UX purpose
You will create two pages in Softr.
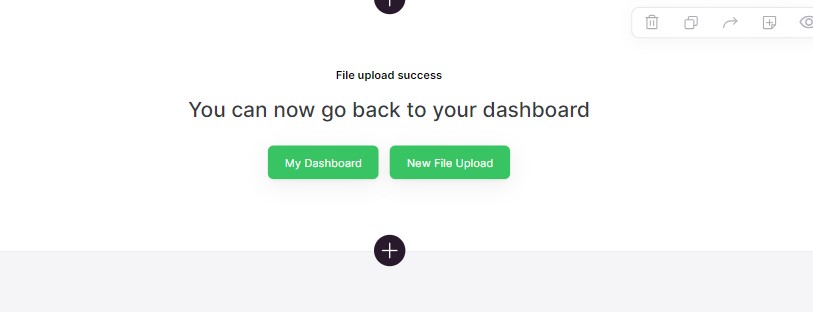
A) One for a redirection, from Make (you will see how below) in case of a successful upload (the user uploads a png or jpeg file with less than 15mb)
In my use case, the url for this page is /file-size-limitation-success
Add a CTA block like this one and that’s it:
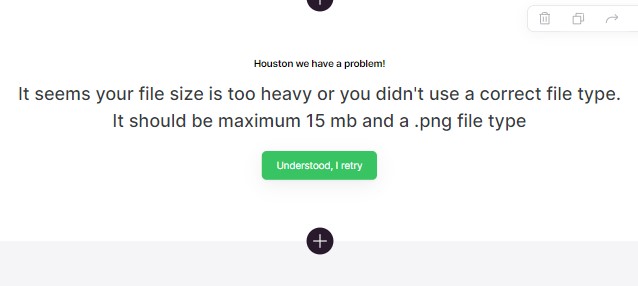
B) Create another page in case of a failed upload (the user didn’t upload a .png file or the file size was over 15mb)
In my use case, the url for this page is /file-size-limitation-fail
Add a CTA block like this one and that’s it (the button redirects to the file upload page).
That’s it for the Softr part.
Let’s go to Make now.
3) Make setup
Here is the look of the scenario:
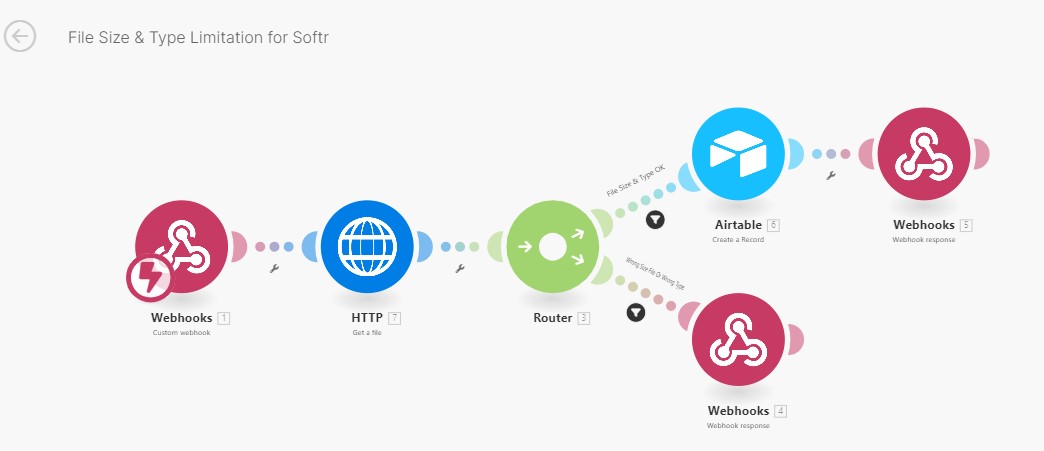
A) Add a webhook module - custom webhook.
Copy paste the adress of the webhook in the input dedicated to it in the form block in Softr.
Then, inside Make, click run once
Then go back to the Softr form and click “click here to send data” (it’s inside the button setup of the form).
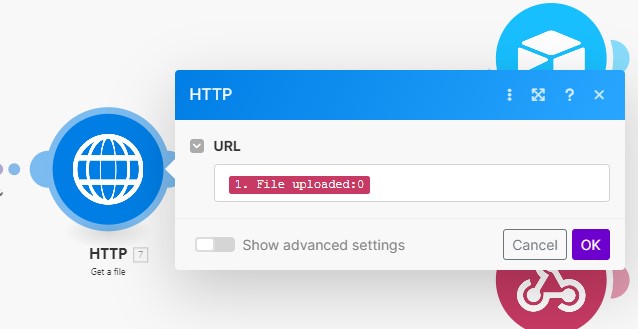
B) Add an HTTP module - Get a file.
The url will be the url of the file that lies in the first module.
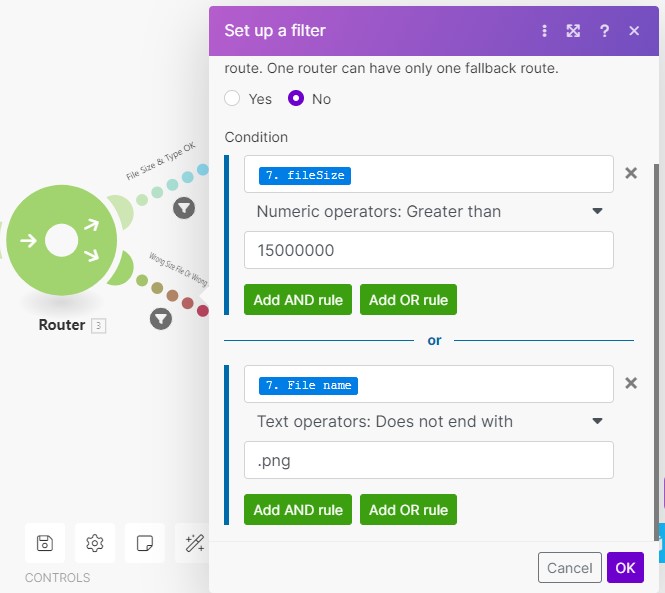
C) Add a flow control - Router
Add two routes (one for successful upload / one for failed upload).
1) The first route, if the file size and the file type are ok, will have this condition:

You can see that fileSize and File name come from the http module, they are easy to find.
The fileSize is written in bytes. Here I wrote “15000000” for 15000000 bytes = 15mb
Then add an Airtable module - Create record - like this one below (set it up as you wish) to pull the file in an Airtable field.

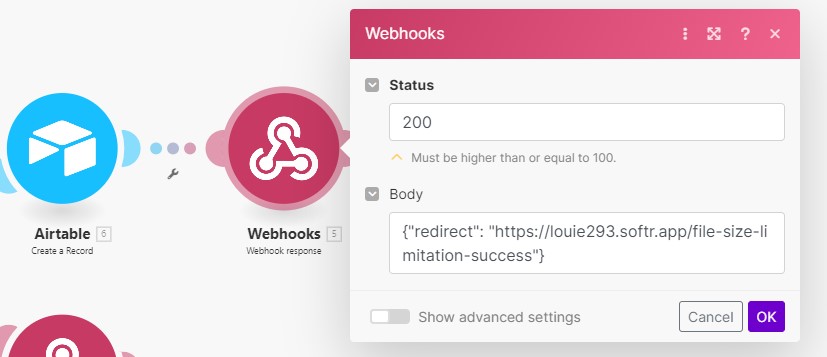
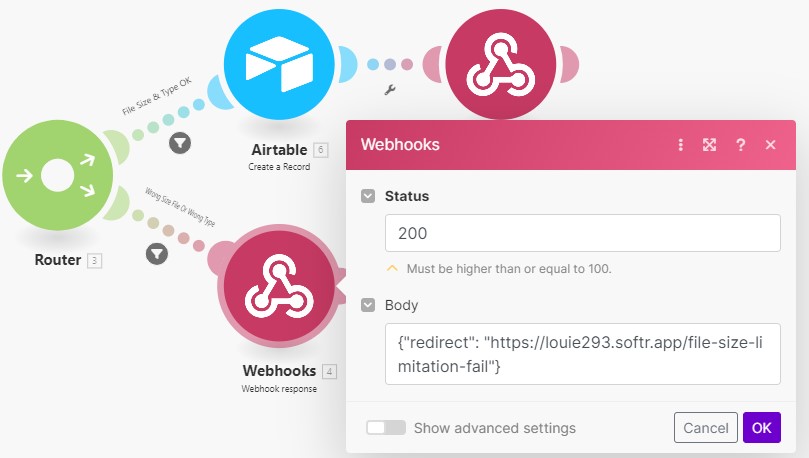
Finally add a Webhook module - Webhook response like this one below (update the url accordingly):
2) The second route, if the file size or the file type or both are NOT ok, will have this condition:
Finally add a Webhook module - Webhook response like this one below (update the url accordingly):
Don’t forget to test the Make modules (”run once”) one by one while you are building the scenario!