Custom code to generate a dynamic page detail

Hi there :wave:

I’m working on a side project that will essentially collect different resources from SaaS companies - pages, emails, etc.

I’ve got the data model already setup in Airtable but I’m missing one step that I believe requires using a custom code block - and that’s why I’m asking the community.

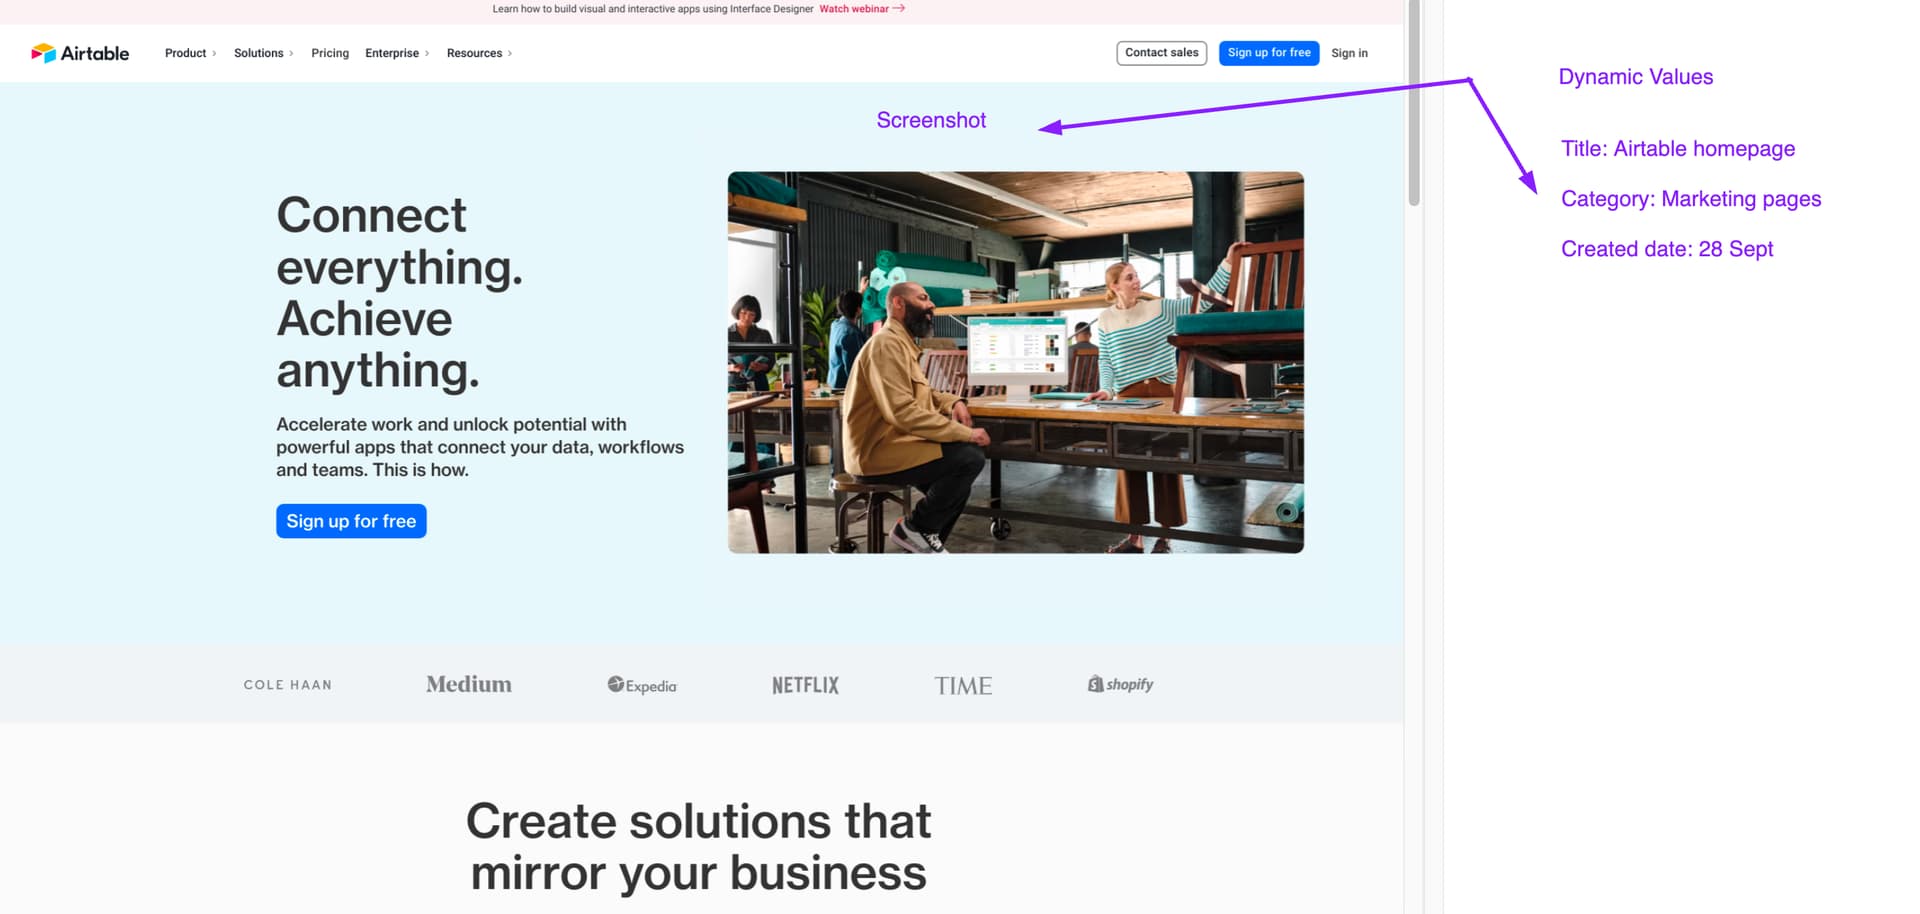
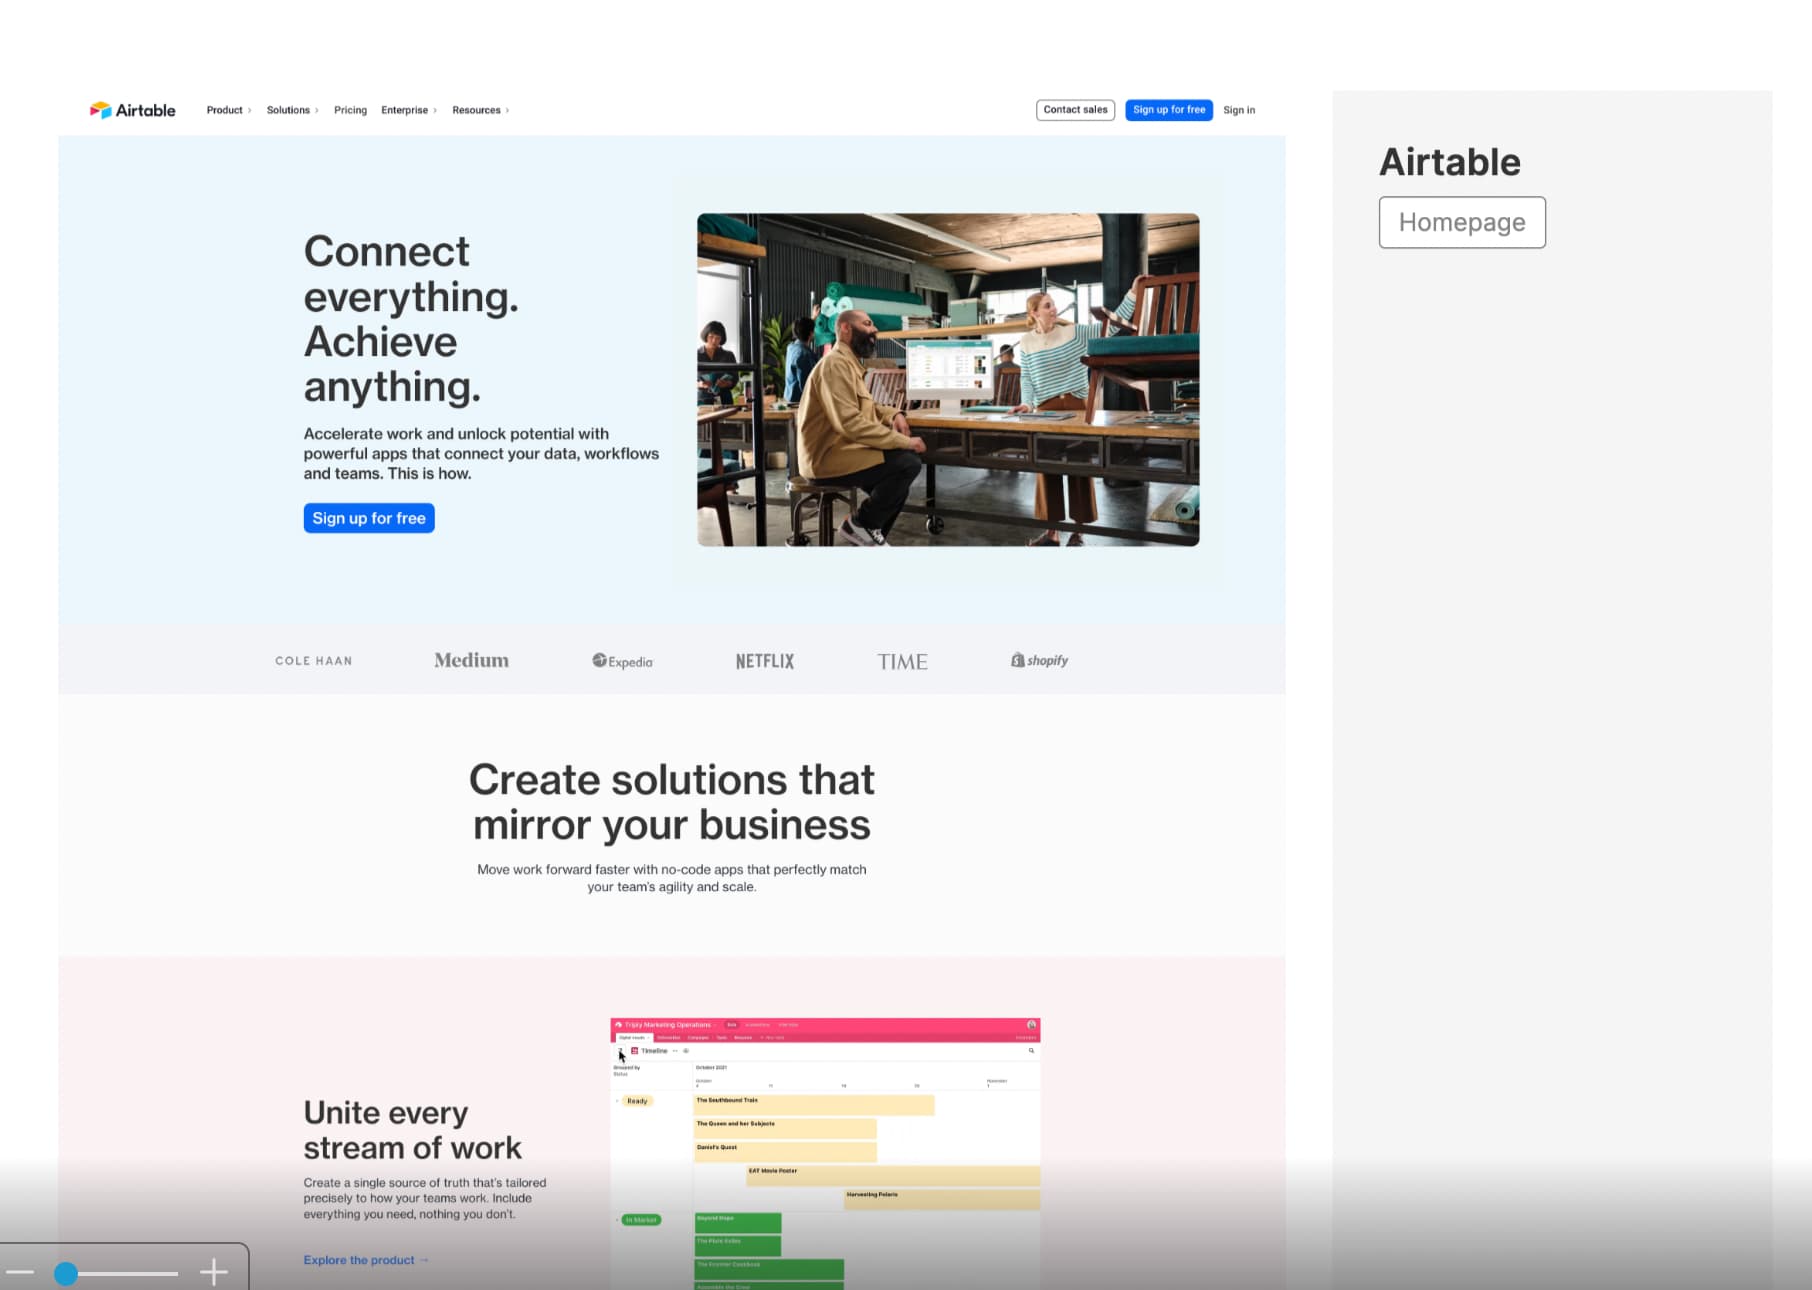
I can’t use the “Dynamic List Detail” block because I want to render the entire screenshot with a custom scroll bar. Here’s an example of a very raw design - please forgive my coding skills.

image

The previous page would be a dynamic list.

So basically, when someone clicks in one of the list items - I want to render the page with that custom code and bring some values dynamically, such as the screenshot, title, category and created date.

Is it possible to pass parameters to the next screen? How should I go about this? Any insights would be highly appreciated.

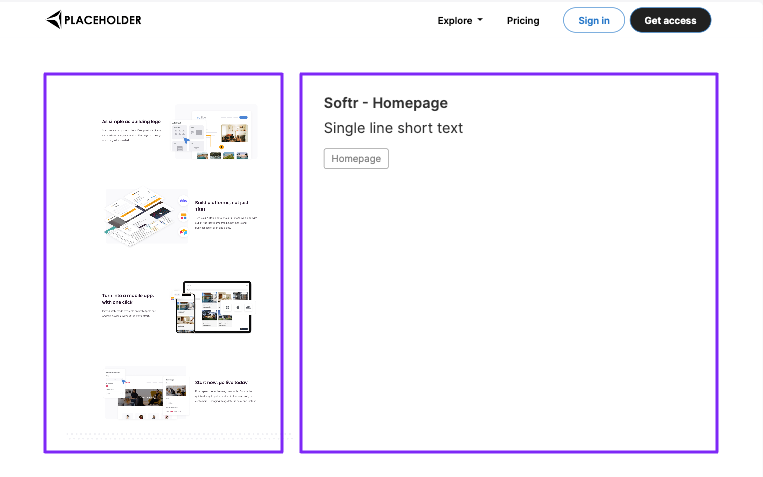
@Javier_GrowthLab one idea would be to put 2 details blocks. one after another 1. Only screenshot and 2. only data and then programatically putting both next to each other. If you do 1 and 2 then we can check and test few small code on top

Thanks @artur for your quick response! So if I understood you right, you’re suggesting to place two detail blocks into the same page.

Then inject some custom code to create that scroll bar and separate the two sections horizontally. Is that possible? If so, is someone inside Softr that might be able to assist with this code?

image

Can you pls create a dummy page with the data so I can see and work on a real setup ?

Apologies for the delay in getting back to you @artur - here’s the dummy page with the setup you recommended.

I’ve created the two blocks one after another.

The ideal layout would be:

  • Left-hand side → The screenshot with a scrollbar - only this section will be scrollable
  • Right-hand side → The information about that page

Link can be found here: Page-detail - made with Softr

Hey @artur just wondering if you had a chance to take a look at this setup. Thanks once again for your help on this

Please try this one

<script>
    document.addEventListener("DOMContentLoaded", function () {   
        $('<section id="section-wrapper"><div class="container"><div class="row"><div class="col-lg-6 screenshot-col"></div><div class="col-lg-6 info-col"></div></div></div></section>').insertBefore('#detail-page-screenshot');
        $('#detail-page-screenshot').detach().appendTo($('div.screenshot-col'));
        $('#detail-page-info').detach().appendTo($('div.info-col'));
    });
</script>

Hey Artur!

Thank you very much for this piece of code - it did work! :raised_hands: Now I need to play around with the CSS to able to create this scroll bar functionality.

Regards

1 Like

Let us know how it goes @Javier_GrowthLab

Hi @artur - reaching out again for some help with CSS.

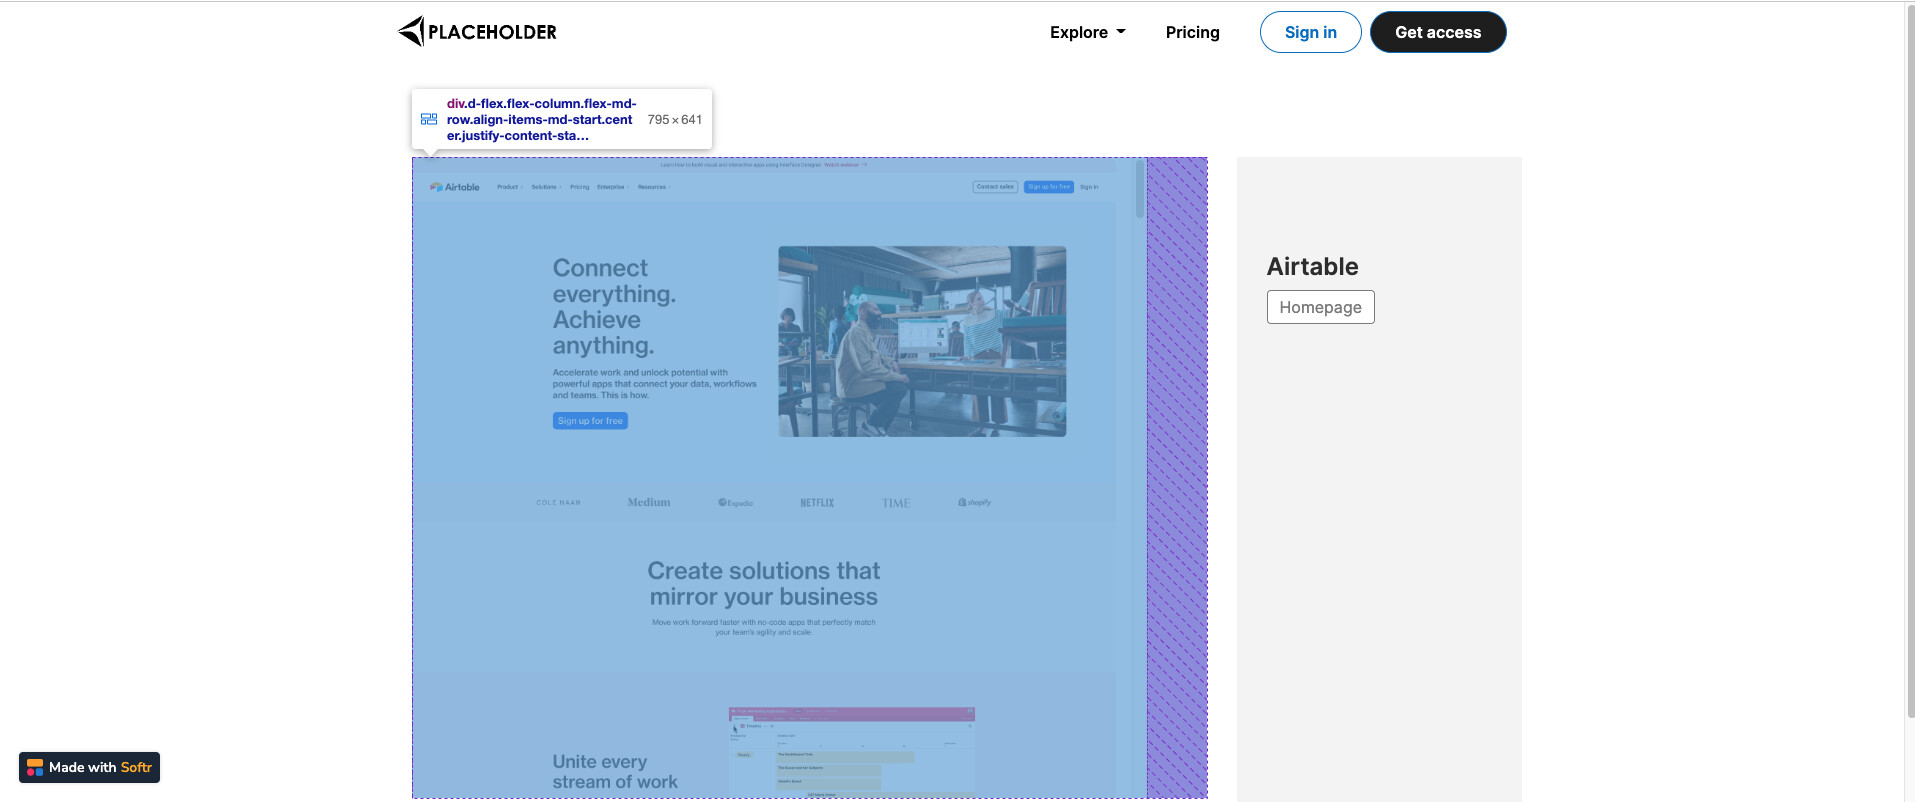
I managed to apply some tweaks to the style of both components, but I’m stuck with the left container. I can’t find a way to fit the content to the entire container, there must be some !important or rems directives that can’t be overwritten.

Basically I want to expand the image to fit the entire container. See the screenshot below.

Appreciate some support here :slight_smile:

Hey @Javier_GrowthLab,

I will check and try to help you :slight_smile:

Thanks @Suzie - I know CSS styles can bit tricky sometimes haha. Let me know if you find a way to solve that. Regards

Hey @Javier_GrowthLab,

Please try this


<style>
#detail-page-screenshot .static-image {
    min-width: 100% !important;
}
</style>

:slight_smile:

Hey @Suzie,

Thanks for your suggestion, but I’m afraid it didn’t work.

Let me share the style changes I already made, maybe the issue is on the CSS rules applied by default.

<style>
#detail-page-screenshot .magnific-popup {
    overflow-y: scroll;
    overflow-x: hidden;
    max-height: calc(100vh - 160px);
}

#detail-page-screenshot .sw-background-position-center {
    background-position: top! important;
}

#detail-page-screenshot .static-image {
    height: 400rem !important;
    min-width: 44rem !important;
    background-size: contain!important;
}

.info-col {
    margin-top: 6rem !important;
    background-color: #f5f5f5 !important;
}

#detail-page-info {
    background-color: #f5f5f5 !important;
}
</style>

There are two things I’d like to solve, which I think they could be fix with the right CSS rules - but that’s definitely beyond my reach.

  1. Expand the image to fit the entire container, so there are no trailing spaces between the left and the right container.
  2. Stop the vertical scroll when the end of the image is reached.

Thanks again for your help on this

@Javier_GrowthLab have you tried removing padding bottom via settings from the both blocks ?

Hi @artur , I didn’t think of that approach - but I tried and it didn’t work either.

The space between those blocks still there :cold_sweat:

I will play around with CSS this weekend to see if I can find a solution,

Thanks everyone

Hey @Javier_GrowthLab,

Will it be ok for you if it looks like this?

Hi!

I have a very similar problem as @Javier_GrowthLab. I am trying to create a dynamic menubar on the left side of the screen was an active scrolling site on the right side(majority of screen).

I would love to access the code used for this. Can @artur please help me?

Here is the design I am trying to replicate:

I posted a discussion on a separate page if it is easier: create a dynamic menu bar

Thank you,
Ilan

Hi Suzie,

I really want to add a similar functionality to my website. I would appreciate if you explained the steps. Where do I need to paste the code for this split screen?

Thank you,
Ilan

Hi Illan,

Not sure if you found a solution to your question. Regarding the snippet of code @artur sent me in this case, you can find it here:

<script>
    document.addEventListener("DOMContentLoaded", function () {   
        $('<section id="section-wrapper"><div class="container"><div class="row"><div class="col-lg-6 screenshot-col"></div><div class="col-lg-6 info-col"></div></div></div></section>').insertBefore('#detail-page-screenshot');
        $('#detail-page-screenshot').detach().appendTo($('div.screenshot-col'));
        $('#detail-page-info').detach().appendTo($('div.info-col'));
    });
</script>

I believe you will have to play around with the “col-lg-6” class in order to split it the way you want it, I’m not familiar with CSS Flexbox, but I think this uses the same principles.

I hope that points you in the right direction :wink:

Regards

1 Like